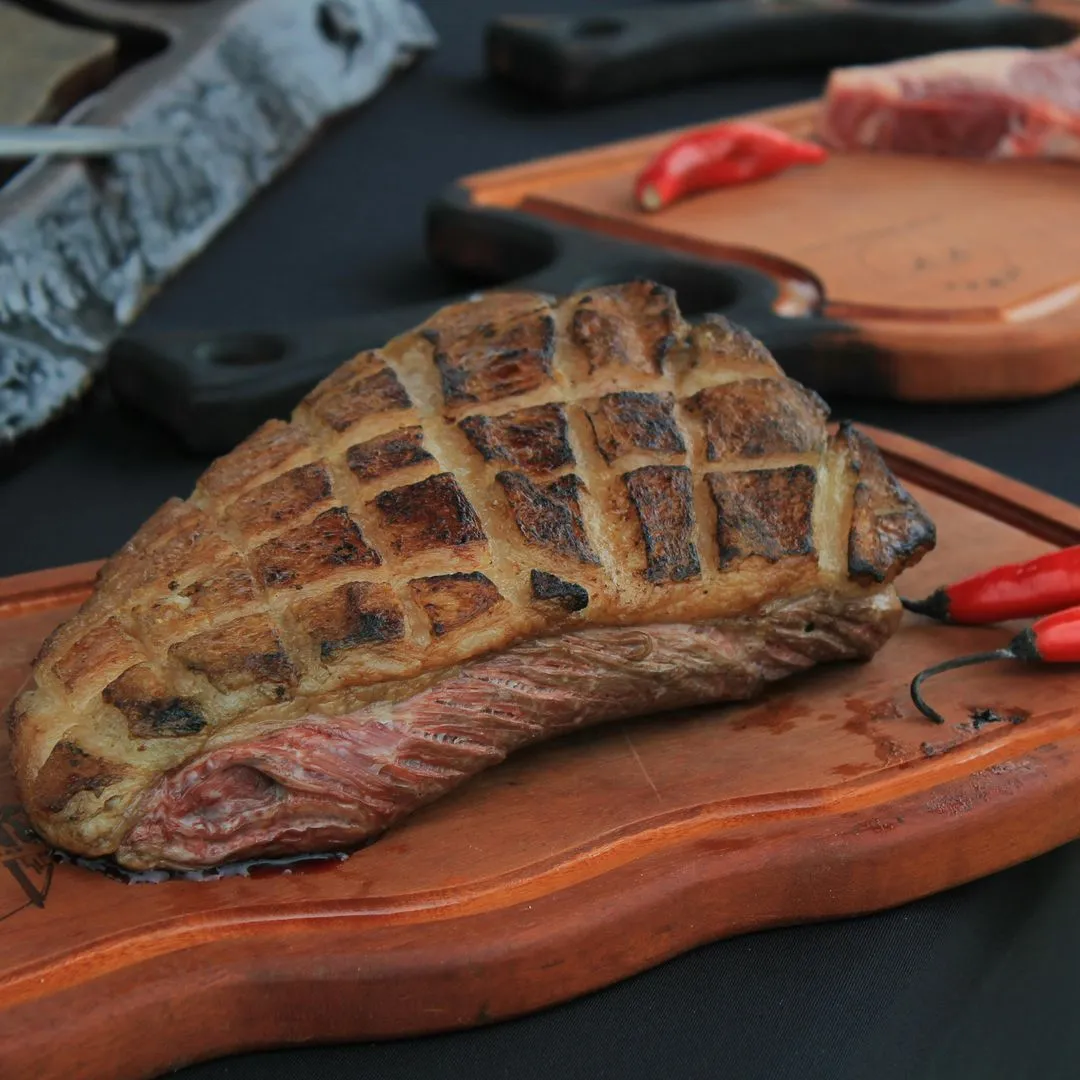
Picanha alla Griglia

gourmet
Preparation time
 10 minuti
Difficulty
 Media
MediaCooking time
20 minutiServings
 4
4Riposo
30 minutiScopri come preparare la picanha alla griglia, il famoso taglio brasiliano perfetto per il barbecue. Con il suo caratteristico strato di grasso e una cottura ideale, questa carne diventa tenera e succulenta, regalando un sapore irresistibile. Ti spieghiamo come incidere il grasso, i tempi di cottura perfetti e il miglior condimento per esaltare ogni boccone. Accompagna la tua picanha con la classica salsa chimichurri per un tocco argentino autentico! Segui la nostra guida passo dopo passo e porta in tavola un piatto da vero maestro della griglia.
Ingredients
- Picanha (Beef rump)1 Kg
- Coarse salt2 tablespoons
- Black pepper1 teaspoon
- Smoked paprikato taste
- Garlicto taste
Procedure
0. To achieve the perfect grilled picanha, initial preparation is essential. Start with a sharp knife and make lattice-like cuts in the layer of fat covering the meat, taking care not to cut into the meat underneath. These cuts, arranged in diamonds or crisscross patterns, not only allow the fat to render during cooking, but also promote the formation of a crispy crust that will enrich the meat with flavor. The crispiness of the fat is one of the most appreciated aspects of picanha, and the cuts also help distribute it evenly during cooking, preventing the meat from becoming too fatty or deformed.
1. Next, rub the meat with a mixture of coarse salt, black pepper, paprika (if you like a smoky touch), and minced garlic. Coarse salt is particularly effective at absorbing excess moisture and helping form a flavorful crust. Black pepper and paprika, in addition to providing a deep flavor, create a light, aromatic crust, while the garlic enriches the mixture with a fragrance that melds perfectly with cooking.
2. Then let the meat rest for at least 30 minutes at room temperature. This step is crucial because it allows the meat to absorb the flavors and reach a more even internal temperature, promoting better cooking. Furthermore, if the meat is too cold at the start of cooking, it risks becoming too tough or cooking unevenly. Resting at room temperature ensures optimal cooking, resulting in more tender and flavorful meat. These steps will ensure that your grilled picanha is not only flavorful, but also perfectly cooked, with a crispy outer crust that enhances every bite.
3. To achieve the perfect grilled picanha, preheating the grill is a crucial step. Preheat the grill to medium-high heat (about 200-220°C). If you're using charcoal, make sure it's very hot before cooking; a grill that's too cold will prevent the meat from developing the right crust and may cook unevenly.
4. Place the Picanha on the grill, fat side down. This is when the fat begins to render and become crispy. Cook for 10-15 minutes without moving the meat, until the fat layer is golden and crispy. This step is essential for obtaining a tasty crust and preventing the meat from sticking to the grill.
5. Once the fat has reached the right crispiness, flip the meat and cook it on the other side for another 10-15 minutes. The goal is to bring the internal temperature of the meat to about 120-130°F (50-55°C) for medium-rare. If you prefer your meat more done, you can continue cooking until it reaches about 140°F (60°C) for medium-rare. Using a cooking thermometer is highly recommended to accurately monitor the internal temperature.
6. Once the meat has reached the desired temperature, remove it from the grill and let the picanha rest for about 10 minutes, covered with aluminum foil. This step is crucial because it allows the juices to redistribute throughout the meat, keeping it tender and succulent.
7. Slice the Picanha thinly against the grain and serve with chimichurri sauce. Serve with toasted bread, a side of baked potatoes, or a fresh salad. 🍷 Pairing tip: A nice Argentine Malbec or an Italian Syrah perfectly enhances the flavor of the meat and the acidic touch of the chimichurri.
Did you enjoy this recipe? Show your appreciation by giving the author some Gourmet Coins!
Creation date Mar 31, 2025
Report recipe
Nutritional Values
Nutritional values per serving
*The nutritional values shown are calculated based on the ingredients provided by the user and represent an average estimate, without taking into account any variations due to cooking methods or other external factors. The information on ingredients is based on generally accepted data and may vary depending on the brand, product quality, and specific preparation conditions. Therefore, the maximum accuracy of the data provided cannot be guaranteed. For precise nutritional information, we recommend consulting a nutrition professional or using specific analysis tools.